My parents left for the Dominican yesterday to the place where our wedding will be!! They are going a week ahead so they could go for two weeks and not overlap the same two as Grant and I so we have time to ourselves.
I've been struggling for a while what to do for table numbers at our wedding reception/party and think I have finally figured it out. The table number stands that were available to rent through the caterers seemed to industrial and/or ugly to me so I've been searching for alternatives in stores and online. So many of them are quite tall so they would be blocking people's view of the person across from them which I didn't like the idea of (plus our centerpieces are only about 4" tall. When I was out shopping I found these cute little photo holders that are a clear shape at the bottom with a silver wire with a clip at the end and thought they might work out. Here is a photo of the test ones I did to make sure they looked as good as we pictured (they don't actually stand crooked that's just the poor set-up I did 'cause I was in a rush). I created the table numbers using our wedding colours by matting them together and printing out the numbers (using the same font from the invitation) on the whisper white cardstock. We are quite happy with they way they turned out.
It's hard to tell in the photos but we got three different clear shapes at the bottom - a heart, star and hexagon. These should sit just above the centerpieces.
What do you think?
Monday, April 27, 2009
Sunday, April 26, 2009
Thank You Teacher - Part 3
This is the final card I created for Taryn! I think it's my least favourite - it's too green. It seemed nicer in my head than it turned out to be. I told Taryn that she didn't have to use it and I would gladly make another but she was being gracious and said it was great! Supplies
Stamps: Stamping Bella Teachabella, SU Sweet Little Sentiments (level 1 hostess)
Ink: SU chocolate chip, close to cocoa, basic black, old olive, real red, bashful blue, pumpkin pie
Pastels: SU creamy caramel, chocolate chip
Paper: SU ww, old olive, summer picnic dp (retired)
Brad: SU old olive
Stamps: Stamping Bella Teachabella, SU Sweet Little Sentiments (level 1 hostess)
Ink: SU chocolate chip, close to cocoa, basic black, old olive, real red, bashful blue, pumpkin pie
Pastels: SU creamy caramel, chocolate chip
Paper: SU ww, old olive, summer picnic dp (retired)
Brad: SU old olive
Saturday, April 25, 2009
Thank You Teacher - Part 2
Here's another card for Taryn to use to say thank you to school teachers/administrators in the school she student-taught at (you can read more about this in the previous post). I think this one might be my favourite - I just love the bright colours.
Supplies
Stamps: Stamping Bella Teachabella, SU Pocket Silhouettes
Ink: SU basic black, pumpkin pie, pixie pink, bashful blue, summer sun, chocolate chip, real red
Pastels: SU chocolate chip, creamy caramel, old olive
Paper: SU real red, ww, pumpkin pie, summer picnic dp (retired)
Supplies
Stamps: Stamping Bella Teachabella, SU Pocket Silhouettes
Ink: SU basic black, pumpkin pie, pixie pink, bashful blue, summer sun, chocolate chip, real red
Pastels: SU chocolate chip, creamy caramel, old olive
Paper: SU real red, ww, pumpkin pie, summer picnic dp (retired)
Friday, April 24, 2009
Thank You Teacher
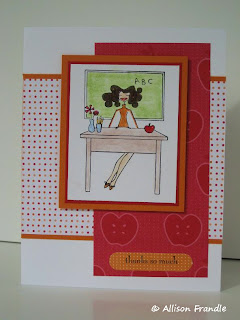
As some of you may be aware Grant will be graduating from University this year with his third degree - this time in Education. A good friend of ours, whom he met through the Education program, asked me if I would make 3 thank you cards for her to give to people in the school where she had this latest practicum. So here is one of the cards I made using this great Stamping Bella stamp "Teachabella." I asked Taryn if she minded if I used this image for all 3 cards because I just love it and it is so fitting for the occasion! So you'll be seeing a couple of more cards over the next few days using this set as well to finish up the cards for Taryn.
Supplies
Stamp: Stamping Bella Teachabella, SU sweet little sentiments (level 1 hostess)
Ink: SU basic black, pumpkin pie, bashful blue, real red, chocolate chip
Pastels: SU chocolate chip, creamy caramel, old olive
Paper: SU ww, real red, summer picnic dp (retired)
Ribbon: SU striped
Supplies
Stamp: Stamping Bella Teachabella, SU sweet little sentiments (level 1 hostess)
Ink: SU basic black, pumpkin pie, bashful blue, real red, chocolate chip
Pastels: SU chocolate chip, creamy caramel, old olive
Paper: SU ww, real red, summer picnic dp (retired)
Ribbon: SU striped
Thursday, April 23, 2009
Look Up to You...
This is another of the Mother's Day cards I created this week. I wanted to make one that wasn't quite so "feminine" and I think this one works because it is still soft(plus if you remove the flower you could use it for Father's Day too because of the blues)! It wasn't made using the walk in the park dp but the colours were inspired by that paper. You may also recognize this layout from the VSSEP08 challenge. I'm getting my mojo back slowly but surely!! Again this is not one of the ones I am giving to either of our parents, so it is also available on Etsy here if anyone is interested. I say this so our parents (especially my Mom) doesn't think I'd be sharing her card with everyone before she even gets to see it!
Supplies
Stamps: Papertrey Ink Father Knows Best
Ink: SU baja breeze
Paper: SU baja breeze, ww, basic gray, baja breeze dp
Button: SU basic gray corduroy button
Flower: SU baja breeze flower from Flower Fusion Too
Misc: Cuttlebug swiss dots embossing folder
Supplies
Stamps: Papertrey Ink Father Knows Best
Ink: SU baja breeze
Paper: SU baja breeze, ww, basic gray, baja breeze dp
Button: SU basic gray corduroy button
Flower: SU baja breeze flower from Flower Fusion Too
Misc: Cuttlebug swiss dots embossing folder
Wednesday, April 22, 2009
A Walk in the Park Mother's Day Card
When I ordered the Stampin' Up! designer paper "walk in the park" I had no idea how much I would love this paper for Mother's Day cards. The colours and patterns are so soft and beautiful - they've been bringing back my stamping mojo (it's about time)! My mojo isn't back completely so I was inspired by the VLVFeb04 sketch challenge because I loved this card that I had created with it before. This card is so soft and elegant but as I said earlier this paper has inspired me a lot so it's not one of the ones I ended up choosing to use for my own Mother or Grant's Mother so I have put it on Etsy here if anyone is interested (I will be leaving April 30th for 3 weeks so if you want it - you'll have to order it before then).
Supplies
Stamps: Papertrey Ink Father Knows Best
Ink: SU cameo coral
Paper: SU ww, baja breeze, basic gray, walk in the park dp
Ribbon: SU basic gray tafetta ribbon
Misc: Cuttlebug swiss dots embossing folder
Supplies
Stamps: Papertrey Ink Father Knows Best
Ink: SU cameo coral
Paper: SU ww, baja breeze, basic gray, walk in the park dp
Ribbon: SU basic gray tafetta ribbon
Misc: Cuttlebug swiss dots embossing folder
Tuesday, April 21, 2009
Possible Wedding Thank Yous
I've been trying to come up with my wedding thank you cards before the wedding so I don't feel overwhelmed/rushed to do it later. I've come up with a couple of ideas that I'll share but I'm not too sure about either of them (it doesn't help that Grant and I both like different ones better)!
Thank You card option 1: Thank You card option 2: I'm also having a dilemma about what to do for a personalized stamp. I usually use the Stampin' Up! Tag It stamp (which I love) but my new name will not fit on it - it has one too many letters. I've been trying to come up with ways to shorten my name but so far I'm not liking using Al (because it could be a guy) or Alli (because I don't really like when people call me that). You can't even just do a "." to do A.. We'll have to see what ends up happening because neither Grant nor I like the idea of stamping the cards with my maiden name.
Supplies
Thank You Option 1
Stamps: SU Botanical Blooms, Short & Sweet
Ink: SU chocolate chip, certainly celery
Paper: SU chocolate chip, certainly celery, ww, chocolate chip dp
Thank You Option 2
Stamps: SU Fifth Avenue Floral, Short & Sweet
Ink: SU chocolate chip, certainly celery
Paper: SU chocolate chip, certainly celery, ww, chocolate chip dp
Ribbon: SU 5/8" certainly celery grosgrain
Monday, April 20, 2009
Appreciation Gifts
I mentioned in my last post that I created little gift tags that I wanted to share with you but forgot to take a picture. Well, I had one left over before I decided what colours to used so I put it together to show you. The gift tags were all created using the Kitchen Sink Stamp 3-step stamping sea shells which give it that great dimension. I created 8 different coloured tags (red, orange, yellow, green, blue, navy blue, pink and purple) and made sure that I had matching tissue paper. Although it doesn't look like it matches in the picture, it is actually the identical colour. The white bags are from Michael's and come in packs of 13 - which allowed the colour and tag to be the focus.I created these, with the beach-y theme, for our family members that are coming with us to the Dominican for our wedding. Inside each bag we put personalized traveler to-go mugs that have our names, wedding date and their position in the party (ie. father of the bride, mother of the groom, etc.) as well as a deck of cards for playing on the trip.
I really wish I had remembered to take a picture of all of them together because they looked great! Oh well, the important thing is that everyone enjoyed them.
Friday, April 17, 2009
Help: Wedding Thank Yous
Sorry for the sporadic posting again - I've been busy getting everything ready for our wedding (both the trip to the Dominican for the actual wedding and the reception afterwards at home with our friends and family).
I forgot to photograph a cute project I made for all of our family that is coming to the Dominican with us that I meant to share - I do have one left over that didn't get used that I will try to get a good picture of tomorrow but it is too dark out right now.
HELP!! I'm having a hard time coming up with an idea for our wedding thank yous to send out after the wedding. I am hoping to get them done before we go to the Dominican since mass production takes me forever because I get bored. I want them to be simple enough to mass produce but not really boring. Anyone have any good suggestions for a good layout?? Any help would be great. I would like to try to stick with the same sort of theme as our wedding invitations/RSVPs and the bridal shower thank yous if possible. I would also like to try to avoid a ton of layers to save on some $.
Monday, April 6, 2009
New Birthday Set
I've been slacking off in the birthday card department again and was feeling a little mojo-less so I was inspired again by this set and this set. Again, I wanted to make this set quite versatile so went for colours that could be considered masculine but not so much so that you wouldn't want to use the cards for anyone. Here are closer looks at each of the individual cards.
Cheers to You: Every Happiness Birthday: Congratulations on Your Birthday: Birthday Celebrations:
Friday, April 3, 2009
Etsy Embellished Paper Store Now Open!!
Due to recent email requests to purchase my cards I have decided to set up an Etsy account store where my cards and other paper crafts will be for sale! Go take a look at my store Embellished Paper. I have looked around a fair amount on Etsy as to what a reasonable price is for products and created my prices based on that.
The majority of my cards will be priced at $5 which will include the card, envelope and shipping. I hope that this seems reasonable to others as I take between half an hour to an hour or more creating each card.
I will take custom orders if there is a card on my blog that you like that is not on Etsy as well as make multiples of individual cards if you are interested in several of the same card (if possible and subject to supply quantities).
I am not sure how successful the store will be, but figured with the influx of emails I have received lately it was worth a go!
Thursday, April 2, 2009
Bridal Shower Thank Yous
This past weekend my aunts held a bridal shower for me with lots of friends and family present. It was so beautiful and so much more than I ever would have thought of and everyone really spoiled me! They went to so much work to make everything perfect and it really was - they even used my wedding colours for the decorations! When I got home from Calgary, I started working on my thank you cards to send to everyone for attending and for making the day so memorable.
I wanted to use our wedding colours for the thank yous and had previously seen this stunning card by Jo Ann and used it as inspiration.As you can see, aside from changing the colours, I changed the grommets to brads, added more layers, changed the stamp set and eliminated the bow and glitter. I love the way that these cards turned out! I don't think my corner rounder punch has ever been used so much before! The main image panel is also raised up on SU dimensionals(you can tell on the cards laying donw).
I wanted to make the thank you cards for my two aunts who put everything together for me just a slight bit different so I changed the colour of the brads from silver to certainly celery (sorry this picture isn't very clear). I LOVE the way this looks but because of the way coloured brads are packaged and sold it would have been too expensive to make them all like this! As much as I love making cards and although it is easier to mass produce cards, I do not think I will be making my own thank you cards for the wedding. I seem to lose interest very quickly when they are all the same so it takes much longer than it should.
Thank you to everyone who attended and worked to make my bridal shower so special. I really appreciate it and will never forget it!
Supplies
Stamps: SU Define Your Life, Fifth Avenue Floral
Ink: SU certainly celery, chocolate chip
Paper: SU ww, certainly celery, chocolate chip
Punch: SU corner rounder
Brads: SU silver and certainly celery
Ribbon: SU white taffeta
Misc: SU dimensionals
Wednesday, April 1, 2009
Occasions Mini Catalogue Starts Today!
The Stampin' Up! Occasions Mini Catalogue starts today! It offers brand new producs available April 1 - June 30th only! Take a look through the catalogue to check out these great products and email me (via the link on the sidebar) if you would like to place an order.
Subscribe to:
Posts (Atom)